Completing garden prep

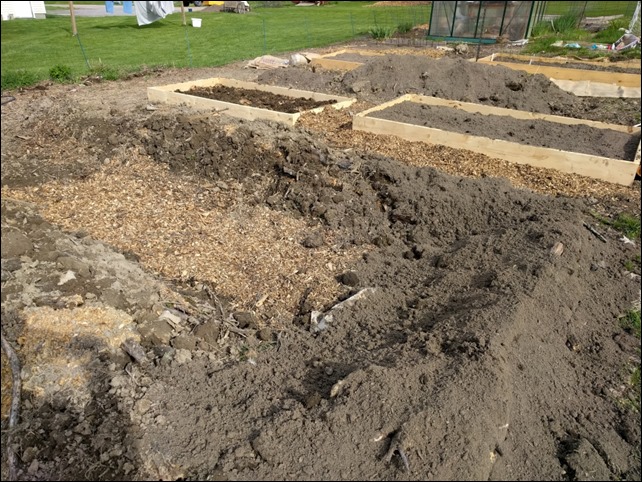
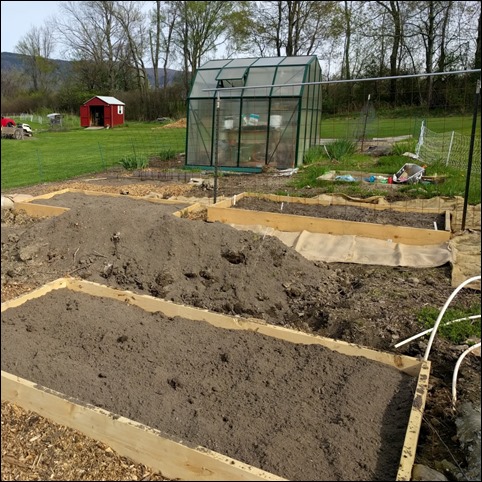
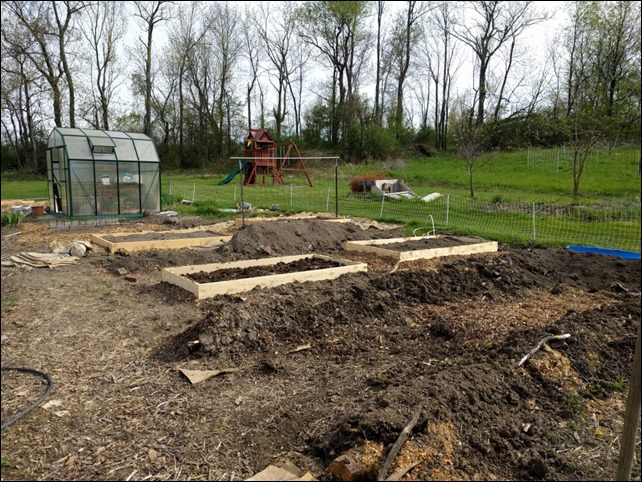
For those of you waiting on bated breath to hear how we are progressing on our garden changes, I have an update for you. We are nearly done building the new raised beds and the hugelcultur mounds are now covered with dirt and ready to use.

Here is the latest mound partially covered in dirt. We really like how it turned out. It’s a U shape, so definitely looks very organic and naturalistic. Not a typical vegetable garden look.

hugelprogress2

We have already started planting a few things in them. As it is the first year, we aren’t sure what kinds of plants are actually going to do well so we are experimenting as always. We do have the mound we started last fall that is already breaking down nicely. We are going to try some melons and squash in that one. It’s back away from the garden in a corner, so if any of those plants decide to travel around we can just see what happens.

Here you can see more raised beds filling in the rest of the open spaces in the garden.

hugelprogress3

And one more view to give you more of a full picture.

hugelprogress1

There are still a few spots that are a bit wide for a walking space and we are putting a few more typical rows. These are trenches filled with rotted cow manure and covered with good garden soil. We are also doing a similar wide row at the end of one of the mounds except that one has a layer of wood chips underneath. So we’ll try and see what happens.

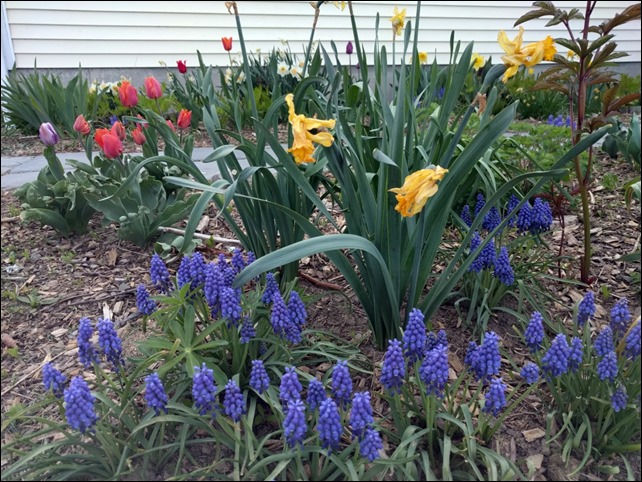
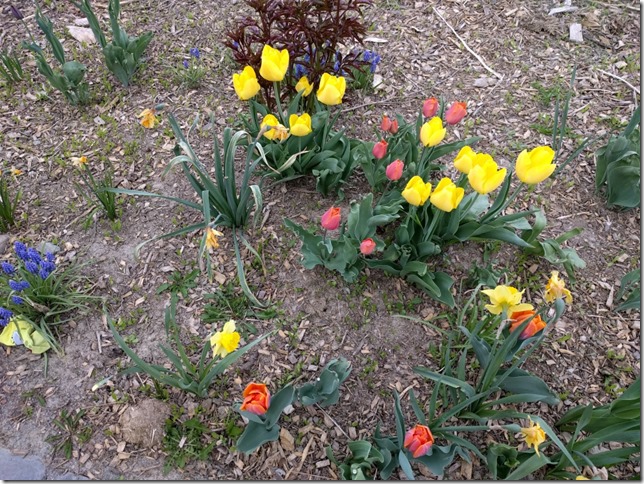
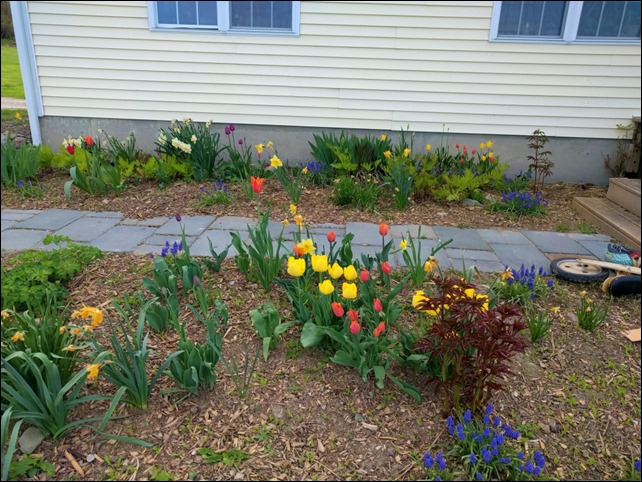
On a side note, we planted a bunch more bulbs last fall in front of our house and it has been absolutely beautiful the last few weeks. Here are some samples:


Hyacinths

Tulips2

Tulips1

The Property is Waking Up

We just got back from a lovely family trip to San Diego. It was just finally starting to feel like spring and warming up when we left. I went for a walk around the property this morning and it’s just so fun to see everything responding. Here’s the short list:

  • Daffodils giving way to tulips and grape hyacinths
  • Peas poking up that we planted shortly before leaving
  • Lots of green growth and leaves on the raspberries. Little raspberry plants popping up in the grass all around as well.
  • Hops starting to put feelers out
  • All our fruit trees are budding, including the 5 we just planted. Good sign!
  • A broody duck and a broody chicken
  • Mint is back
  • Asparagus is finally up

Garden Work In Progress

As I mentioned in my last post, we are transitioning much of our gardens to raised beds and hugelcultur. We are currently building our hugelcultur mounds, so I thought it might be interesting to show the progression.

IMG_20180422_165916

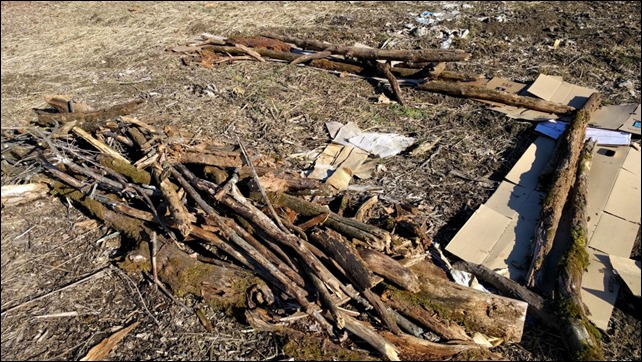
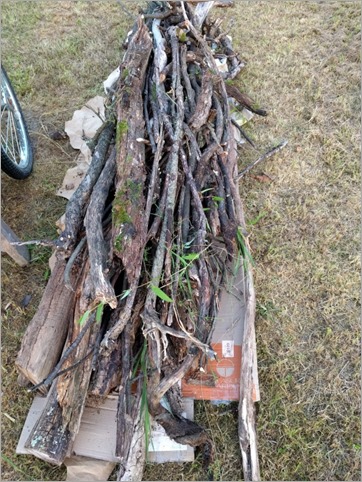
We usually try to start with cardboard. If you are building on top of grass, you will probably want to build a trench first. We start with larger partially-rotted logs from our woods. You can also use freshly cut logs or a mix. Just depends what you want.

IMG_20180422_165956

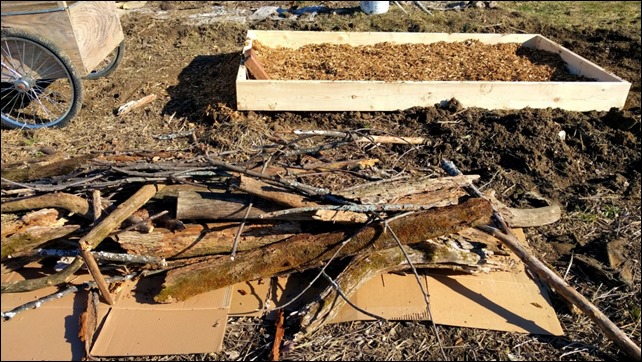
By using partially rotted logs, we’ll get things rolling  a bit faster and we won’t need as much nitrogen to break things down. Plus the logs should already have lots of good fungal and other micro-organism stuff going on. The down side is the lifespan of the mound will be shorter as everything will break down more quickly.

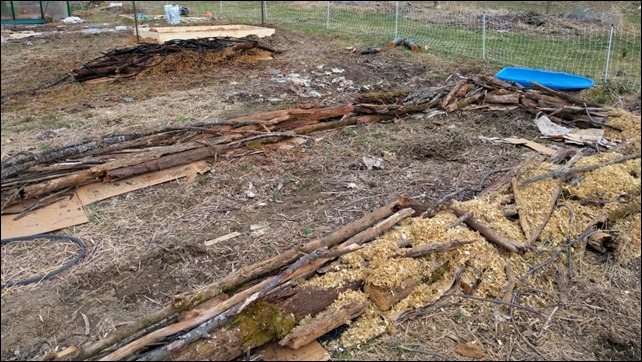
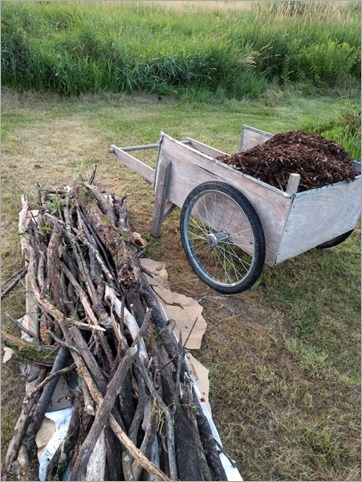
After the bigger base logs are in place, we add smaller branches, twigs, leaves and other stuff we can grab from the woods. We’re also growing to throw any organic material we can find on top. This might be shavings/manure from our coops, wood chips, compost, hay or straw, some of the well-rotted cow manure we got from our neighbor and so on.

IMG_20180424_180906

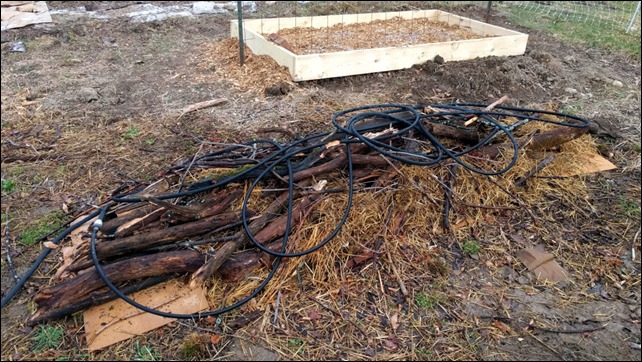
You basically want to saturate all of this stuff with water. One way is to use a soaker hose, particularly if you don’t want to stand there watering by hand for minutes at a time.

IMG_20180424_180927

Or you can take advantage of the rain as you build as we are doing today. Just depends how fast you are putting one of these together.

Once we’ve piled up all the material, you cover the whole thing with soil and you can plant stuff right away. It’s better if you build this a year in advance or maybe the previous fall. But you get some benefit even the first year.

Subsequent years should just get better and you can continue to add more organic material to the top of the mound each spring.

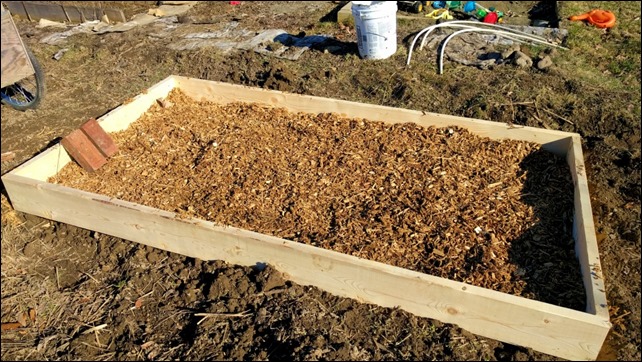
As far as our raised beds, here is one of those in progress. Our basic plan is cardboard at the bottom, then a layer of wood chips, preferably some manure or other rich nitrogen source and then soil on top. I’m curious to see how well this works. May have to play around with nitrogen levels the first year. I started a few of these last fall with just the chips and manure and I’m already seeing some nice breakdown this spring.

IMG_20180422_170003

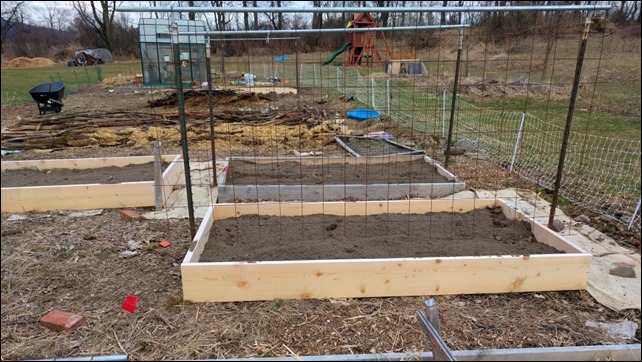
Here are a couple more ready to plant, with our trellis system installed over the bed.

IMG_20180424_180848


Goals for 2018 Growing Season

I’m hoping to start blogging a bit more this year as we are making some changes in our approach. I want to share what we are doing and try to document how well it works.

First some background. When we first bought this property, we were really anxious to get rolling on large-scale gardening and so we carved a couple of large garden spaces out of the lawn/pasture. We thought it would take a few years to get soil fertility and workability up, but then things would start to click. However, we have discovered there are a couple of flaws in that assumption.

The first challenge is the heavy clay on much of the property that is common in this area. It’s fertile soil and holds onto nutrients well, but is very difficult to work with unless the moisture levels are correct. Except in uncommon years, the moisture levels are almost never “correct” here. In the spring the ground is super saturated, which delays planting, causes seeds and seedlings to rot and allows weeds to take hold. In the summer, things dry out and then the soil turns into hardpan that holds onto rhizomic grasses and other weeds and is hard to work.

The second challenge is the huge amount of spring water in general. In a good year we don’t start drying out until mid-June. Last year the whole month of June was bad. We planted corn three times and never really got a great crop. My beautiful tomato seedlings (best I’ve ever started) never had dry enough roots and so they either died, got infected or took a long time to get started. We did a lot of work the first few years to improve drainage and add swales to direct water away. It has helped a bit, but not enough.

So we’ve decided to transition to more of a permaculture approach. We are switching over the garden behind our house to a series of raised beds and hugelcultur mounds. Our front garden plot is going to have a few raised beds for plants like watermelon and pumpkins, but we’re mostly going to just cover it in a deep layer of wood chips, manure and other organic matter and try to build up the soil. We’ll probably plant some cover crops, but maybe not much more than that. We are hoping this will help us to focus our soil building efforts by building up organic material in the raised beds and mitigate some of the moisture issues with the hugelcultur mounds. We also hope this will allow us to keep weeds under control a little better or at least make them easier to pull. This will also involve primarily using a no-till, deep mulch approach in most of our growing areas.

In addition, we are going to continue to plant more perennial food plants (mostly fruits, possibly some nuts) and hopefully get the first round of trees planted for our wind/noise break. I would still really love to get some mushroom cultivation going as well. So far that has been mostly a failure, but we’ve met some folks that are doing it successfully. So hoping to get a bit of mentoring this spring. I’m clearing some of the brush out of the small woody areas on the edges of our property, so thinking moving mushroom logs under the canopy might work better. We’ll also use the rotten logs and leaf debris for our hugelcultur mounds and chip a lot of the brush to use as organic matter as well.

As usual, gardening seems to be one long experiment, but it does scratch the optimization itch in the way my mind works. In all this we are hoping to get to a place of less work and more production. Or at least the more “fun” work of gardening instead of spending most of the time trying to stay ahead of the weeds.

The joy of ducks

We are having a record high February warm-up here in Vermont, with highs in the 60s today. The ducks are having a blast and are so excited to have actual water to play in. It will still be a month or two before we start warming up for good, but at least for today the ducks are very happy to enjoy this while it lasts.

Building our first Hugelkultur mound

One of the interesting permaculture concepts we’ve been wanting to try is hugelkultur. We know some folks around here that utilize this technique and it is particularly well-suited to the very wet spring and early summer we had this year.

hugel1

If you’ve never heard of Hugelkultur, it’s basically a raised gardening bed with a foundation of wood and other organic materials that slowly rot over time to provide nutrients, improve drought tolerance and so on. You can read more about them at the UK Permaculture site.

hugel3

We don’t have a lot of woods on our property, just a bit around the edges and an outcropping at the back of our property. However, it’s pretty dense with a lot of downed wood, vines, shrubby material, etc. We really need some goats to clean it out. Anyway, there is enough good woody material even in the small area we have to use for a hugelkultur mound.

I made a quick video showing the initial foundation.

Quick Garden Update (or as I like to call it, the Slough of Despair)

Well, we either picked a great year or a terrible year to convert to no-till.

Maybe great since the first few years it takes time to build true soil fertility and keep weed pressure down without relying on tilling. So often the first couple years are frustrating.

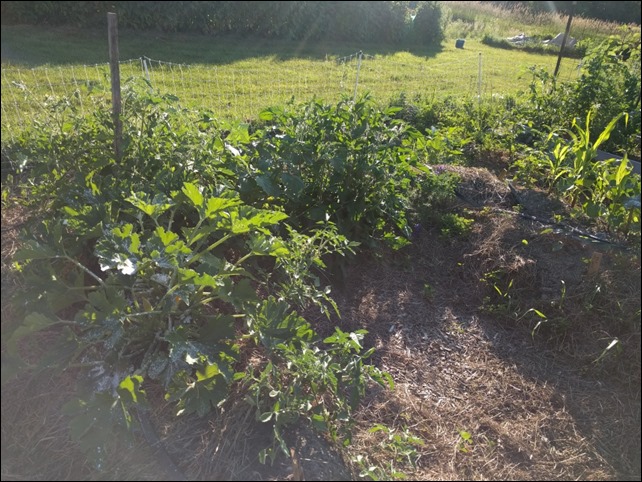
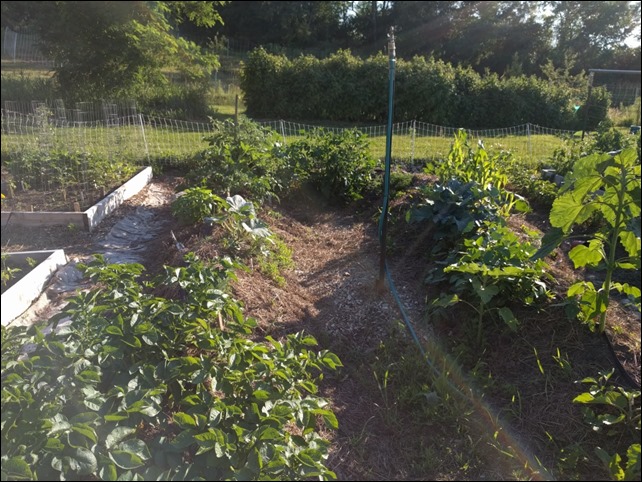
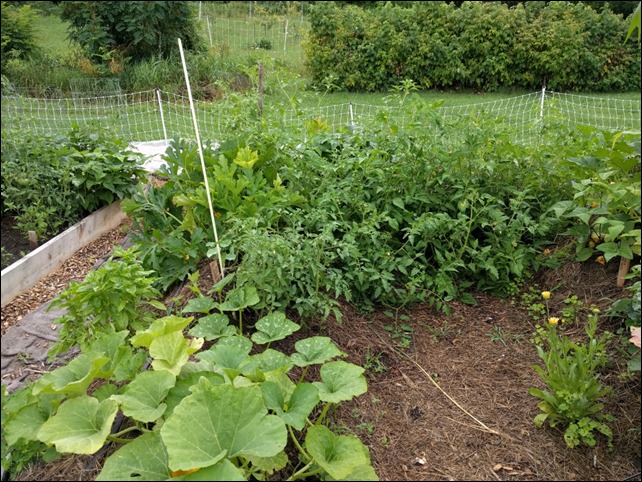
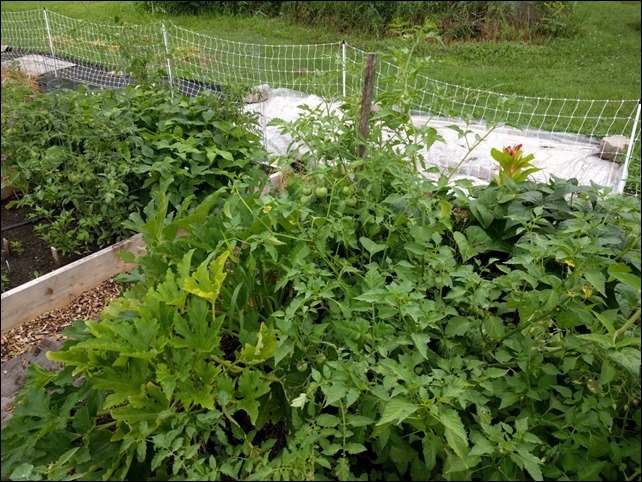
Maybe terrible since we are also fighting one of the most wet summer starts I’ve ever seen in my life. I don’t know the official totals, but I saw that someone in Vermont there was at least 7 inches of rain in June. I won’t post a picture because it is just depressing.

Last summer was so hot and dry I was irrigating a couple times a week. We did get an insanely great tomato crop though. Anyway, this is what climate change looks like folks. Lots of extremes and finding news ways to mitigate those effects.

Kristin was saying she at least expected some things to be doing well, but the fact is there are very few plants that actually like it wet underfoot. There are a lot of plants that thrive in damp, overcast, not too hot conditions. But not standing water around the roots. I can’t think of a single garden plant that like that type of environment, except one obvious one (rice). Some other plants do well in bog conditions (cranberries, willows, elderberries within reason, etc.). But nothing you want to grow in your garden.

I hate to admit this, but it took me a couple of weeks to realize that even if I’m not tilling, I still really need to hill up the rows and make sure the space between rows is lower. Obvious, right. Rookie error on my part. We’ve lost so many seeds to standing water and rot so far. I started hilling up the rows, re-planting and covering with 100% sand and those seedlings are actually doing okay, even after the deluges of last week.

I was commenting to Kristin that with gardening, you really have to reach a point where all these different techniques and practices just become intuitive and second nature. We aren’t quite there yet, but one of these years we’ll get all the pieces put together. And that will probably be the year we get a plague of locusts. Happy gardening.

Deck Project: Installing the footings

As I’ve mentioned, our big non-gardening project this year is rebuilding our back deck. Today we got the construction process started with the installation of our footings.

IMG_20170512_101156-01

My contractor Rich had mentioned the idea of helical screw piles to me as an alternative to the typical concrete tube footings. Did a little research and it did seem like a good fit and we have a local franchise for GoliathTech in Bristol. Basically they are a giant screw that are turned into the ground with a special attachment on an excavator. They have a torque measurement that helps them see if they are getting enough holding power in the spot and they go plenty deep enough to take care of getting below the frost line. Once in, they are almost impossible to pull out without using the same equipment and even the small ones that I got are rated at about 5000 lbs. load bearing each. SunCommon, the company that installed our solar, is now using screw piles for all of their panel installations.

IMG_20170512_101929-01

After getting some additional information and rough quotes, it seemed like a good fit and so today we had them come out and install the five footings we need for our deck design.

I have to say I’ve been very pleased with the process and there are a bunch of advantages to me over the traditional concrete footing method

  • No excavation needed
  • No heavy equipment tearing up your yard (the Kubota they use is on treads and is small enough to fit through a 38” wide space)
  • No trying to get a concrete mixer out and all the associated time involved with concrete. I guess you could also get pre-filled tubes, but then your excavation has to be even more spot on and you are digging 4 foot plus holes.
  • It’s fast, only took about an hour and a half and we could build on it today if we wanted.
  • It’s actually cheaper, at least for what I needed for my project.
  • The hardware gives you about 6” of adjustability up and down.
  • Less movement in the ground
  • Longer lasting and more durable.

If you are thinking of building a deck or dock or something like that, it’s probably worth considering these. I may look at them for a small animal shed we want to build next year for goats and sheep.

Couple more shots showing how they screw these in, how long the screws are and how they check the level the whole time.

IMG_20170512_101253-01


IMG_20170512_101209-01

Baby chicks!


IMG_20170508_073152-01

We picked up six baby chicks on Saturday. These are supposed to be females and will get some new blood into our laying flock.

Trying a couple of new breeds as well.

2 Barred Rocks (we have one barred rock and she is the nicest hen we have and the only one remaining of our original four)

2 New Hampshire Reds

1 Buff Orpington

1 Silver-laced Wyandotte (we have a golden-laced and she is really pretty)

Quick Spring Update

Lots of life stuff to deal with so far this year, but I wanted to just get a few notes in about what we’re working on this spring. So far it’s been very wet, so I think it’s going to take a bit longer to get certain things in the ground than last year. That being said, the soil structure in the garden continues to improve, so that helps.

Last week we planted probably the last larger order of fruit trees in the orchard. At this point there are probably enough trees out there. Still a chance we’ll include some additional fruit trees in a food forest/ wind break or something elsewhere on the property, but we’ll see. This year we planted the following:

  • Ashmead’s Kernel – great heirloom, good for cider, drying, etc.
  • Chisel Jersey – this one isn’t much use for anything but cider
  • Dabinett – another English cider apple, we already have one of these started from a previous year. Makes an amazing single varietal cider.
  • Golden Hornet – cool crab apple type with yellow fruit, very nice in the spring as well and a great pollinator
  • Redfield – another cider apple
  • Spitzenburg Esopus – second one of these as well, the first one we planted is probably one of our best trees so far. This is one of the varieties Thomas Jefferson was infatuated with.
  • Mount Royal Plum – first plum tree, hardy to zone 3, curious how this one does
  • Northstar Cherry – not having great luck with getting cherries started, so planting another. Much more susceptible to transplant shock than apples.


I did a count and I think this brings us to around 30 trees, give or take. If I can get even half of these to thrive, we’ll have more fruit than we know what to do with. We’ll let you know when that happens in case you are close enough to enjoy some yourself.

Otherwise, seed starting continues to go well. Tomatoes are going gangbusters and I’m running out of room to the point that I’m already putting some extras in the greenhouse. Calculated risk as it may still get too cold, but if not they will be hardier and bigger when we transplant. Probably going to share some seedlings as well. We started some seeds Kristin saved and got really good germination on all of them, so we’re curious to see how true to type those are. This was a bit of an experiment to see how well we could do at growing our own saved tomato seed, so this year we may be a bit more intentional to avoid cross-pollination.

We aren’t doing a ton of new things this year, but Kristin is getting more and more interested in medicinal herbs and plants so we are trying to grow a few more of those type of plants. We are also trying to get comfrey going in the orchard (non-invasive type that makes sterile seeds). Comfrey is great for all kinds of things and will outcompete some of the undesirable grasses and weeds in the orchard to eventually become a living mulch. When it gets tall, it falls over so it almost does the mulching for you. Tons of nutrients and minerals and good for the soil as well. I’m also trying to see if I can start some perennial shrubs from seed (sea buckthorn, service berry, Siberian pea shrub). This requires cold stratification (basically starting for a few months in soil in a fridge) and getting to transplant stage takes two growing seasons, so it’s a multi-year experiment.

The other big spring project is re-doing our back deck. This will be a lower deck, almost at grade (basically 1 step down to the ground). We plan to put some beds around the perimeter of that and probably some cedar planters so we can have some herbs and flowers within steps of the back door. Hope to post pictures of that process once we get started.