Spring 2023 Homestead Tour Videos

I know it’s been a long time since I’ve posted anything here, but just in case anyone is still checking this out. I’ve been creating a decent amount of content for my job, which leaves me not wanting to spend my free time doing this as much. On the other hand, I’m gradually getting better at video production and narration so I can put that to use here.

These videos are very lightly edited, mostly free-form. To be honest, I mostly do them for myself as one way of tracking progress over time on the property. But hopefully you’ll find it interesting to see what we’ve been up to lately as well and see various new projects we’re working on.

Completed Stone Walls in Garden

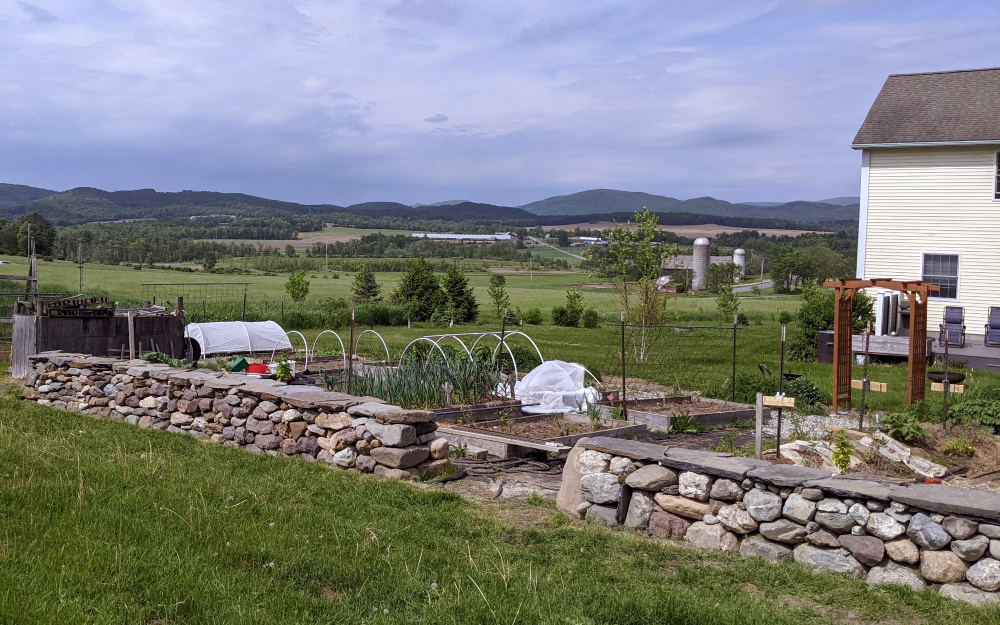
Quick post to show the completed stone walls. The masons came yesterday with some beautiful flat rock from over the mountain in Vermont. The walls are now capped and generally finished out and the whole effect looks much more complete.

From the deck
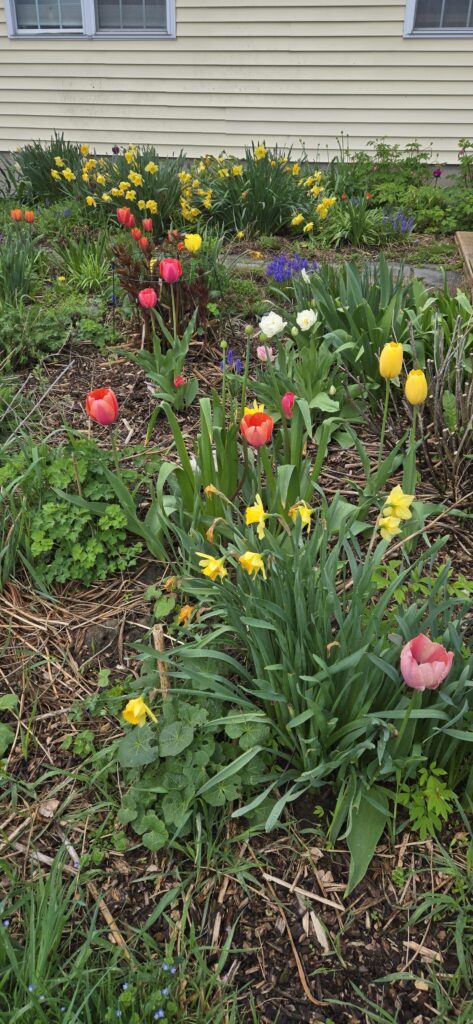
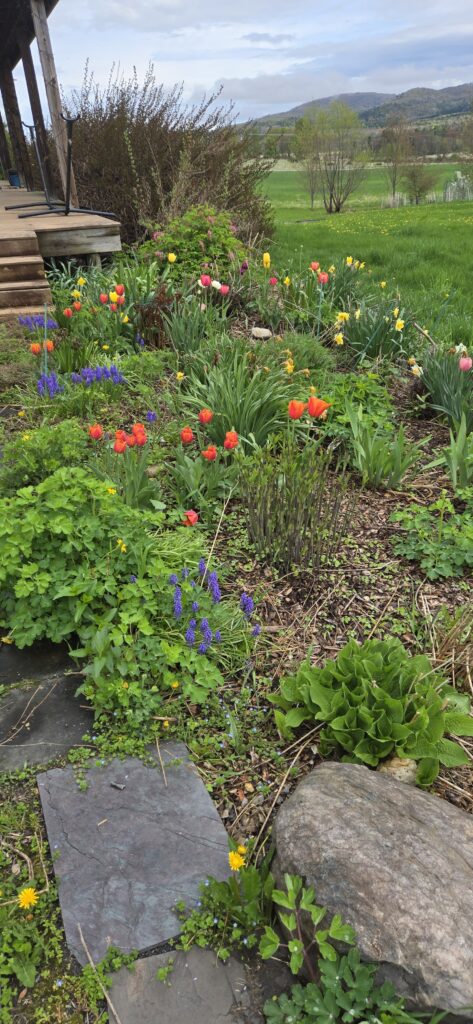
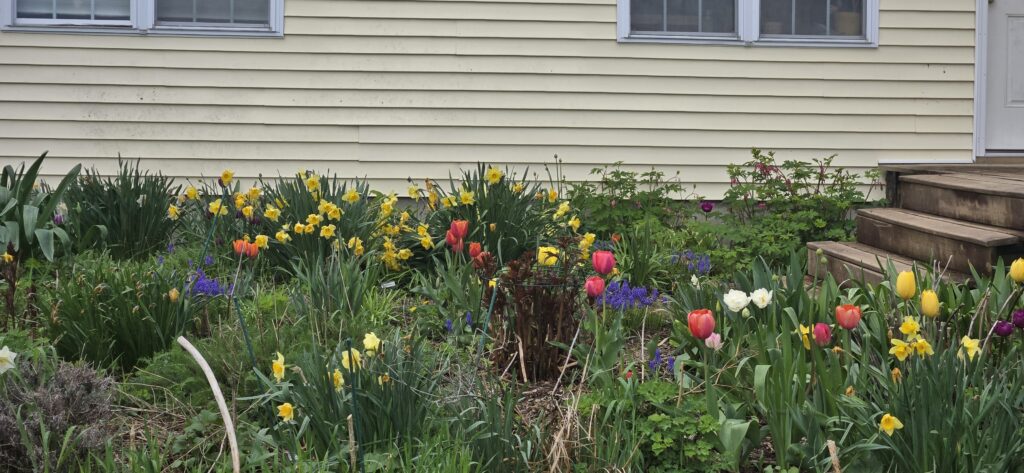
Here you get a sense of the lovely late spring flower bed in front of the garden
Detail from inside the garden
Looking from behind the wall across the valley
More detail from the back of the wall

Spring 2020 Homestead Preview – Stone Wall Progress

I’ve mentioned before we have been working on a dry stone wall to run along the back of our garden. This is a landscape element I’ve long been fascinated with, mostly due to its relative permanence, the history attached to it and the almost zen aspect of building them. I have a mason friend who has been helping us who has a lot more experience and training than me, but I have been able to put what I’ve learned so far to use. It’s one of those skills where learning the basic techniques is simple, but mastery can take a lifetime.

We made good progress last year and should be able to finish off this portion by mid-year or so. The hardest part is getting the right selection of rock without breaking the bank. We got a load of quarry rock delivered last year, but many of those rocks are too large to easily move without equipment. One more reason to finally buy that tractor. Still, there is a lot of good stone there and it was relatively cheap.

I was happy to see the wall barely moved all winter and so far it’s been good with all the rain this spring. So I think the foundation is working reasonably well.

Spring 2020 Homestead Preview – Windbreak

Here is the second video showing the windbreak area we’ve been trying to establish on the northwest to north side of our house. It’s probably going to end up being a visual or noise break more than a windbreak. It won’t quite be tight enough to completely break up the wind, but hopefully will at least disrupt it a bit. The wind on this side of the house hits our bedroom directly and there are always some nights every year where it is so loud it is hard to sleep. In addition, we actually get a lot of road noise from the main road running not too far from our house. So trying to break that up a bit as well.

Initially, we planted a few evergreens and those are the oldest trees. A few years ago, we worked with a local agro-forestry expert to come up with more of a plan. The result of that is the two lines of trees you’ll see in the video.

We’re also hoping to start to fill in some of the space between the house and the windbreak with edible landscape plants. Hoping the shelter of the trees starts to create a bit more of a micro-climate, with some wind protection and temperature moderation. I’m also still on a quest to reduce the amount of lawn on the property and replace it with more diversity. Gradually moving towards a more permaculture way of approaching the landscape.

Spring 2020 Homestead Preview – Front Garden

As we start to make progress on transforming our property, I thought it might be interesting to video the state of things here at the start of spring. I’m planning to do several of these videos focused on different parts of the property.

This first one is showing what is going on out in front of our house. The front garden has been problematic, although we’ve been able to do some good things with it. It generally ends up overtaken by weeds by the end of the summer. Because this used to be pasture, there are well established rhizomic grasses that like to run about 6-12 inches under the soil. The grass shoots then pop up everywhere and unless you get rid of the roots, it just comes back. I’ve tried doing major digging and weeding to pull out roots, but it’s a bit of a fool’s errand.

There is also some sort of low ground-cover weed that probably came in on wood chips originally. It also has a rhizome growth habit. Between these two weeds and the heavy clay soil, it’s been frustrating. I should’ve listened to my wife and cover-cropped it for a few seasons before trying to plant there. Although with all the grasses underground, it wouldn’t have completely solved the problem. I just purchased an EGO edger, mainly for our flower beds and other beds in the lawn. But it might help here as well if we can cut off the traveling roots.

As I mention in the video, we’re going to use this more for perennial food bushes, possibly growing tree starts and then try to use raised beds and hugel for anything seasonal we grow. I also think the hardscape around much of the boundary of the garden will help keep the lawn from encroaching quite so much.

Deck Project: Installing the footings

As I’ve mentioned, our big non-gardening project this year is rebuilding our back deck. Today we got the construction process started with the installation of our footings.

IMG_20170512_101156-01

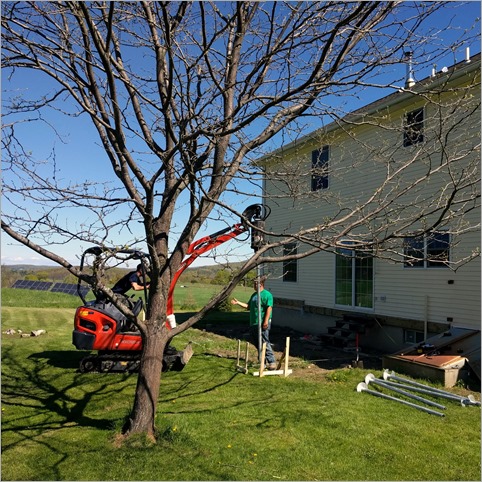
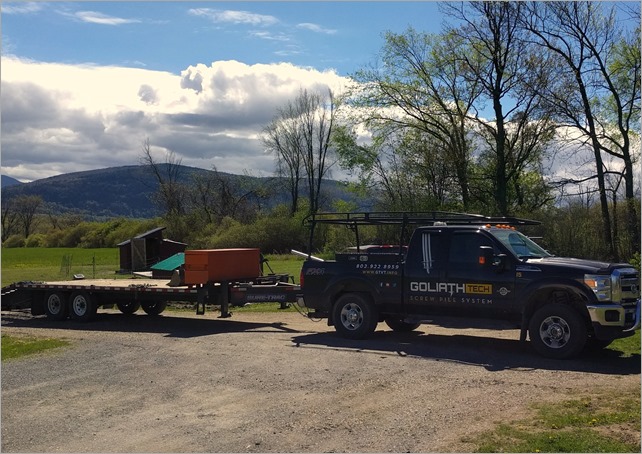
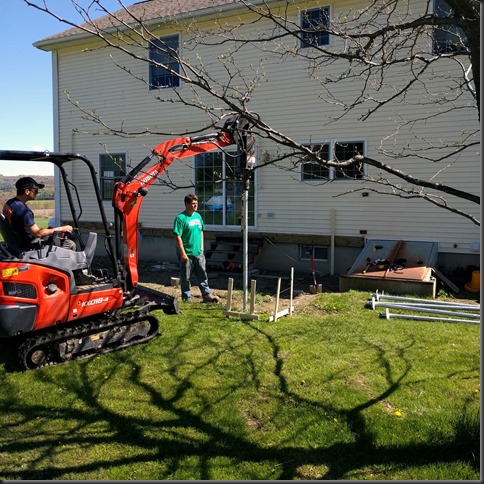
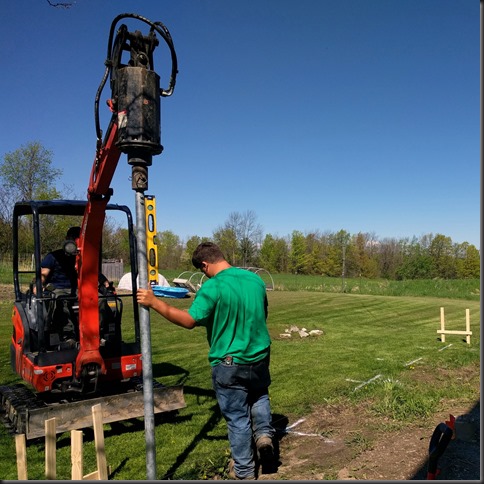
My contractor Rich had mentioned the idea of helical screw piles to me as an alternative to the typical concrete tube footings. Did a little research and it did seem like a good fit and we have a local franchise for GoliathTech in Bristol. Basically they are a giant screw that are turned into the ground with a special attachment on an excavator. They have a torque measurement that helps them see if they are getting enough holding power in the spot and they go plenty deep enough to take care of getting below the frost line. Once in, they are almost impossible to pull out without using the same equipment and even the small ones that I got are rated at about 5000 lbs. load bearing each. SunCommon, the company that installed our solar, is now using screw piles for all of their panel installations.

IMG_20170512_101929-01

After getting some additional information and rough quotes, it seemed like a good fit and so today we had them come out and install the five footings we need for our deck design.

I have to say I’ve been very pleased with the process and there are a bunch of advantages to me over the traditional concrete footing method

  • No excavation needed
  • No heavy equipment tearing up your yard (the Kubota they use is on treads and is small enough to fit through a 38” wide space)
  • No trying to get a concrete mixer out and all the associated time involved with concrete. I guess you could also get pre-filled tubes, but then your excavation has to be even more spot on and you are digging 4 foot plus holes.
  • It’s fast, only took about an hour and a half and we could build on it today if we wanted.
  • It’s actually cheaper, at least for what I needed for my project.
  • The hardware gives you about 6” of adjustability up and down.
  • Less movement in the ground
  • Longer lasting and more durable.

If you are thinking of building a deck or dock or something like that, it’s probably worth considering these. I may look at them for a small animal shed we want to build next year for goats and sheep.

Couple more shots showing how they screw these in, how long the screws are and how they check the level the whole time.

IMG_20170512_101253-01


IMG_20170512_101209-01

2016 Solar Update

Just wanted to post a quick update on how our solar installation is doing. 2016 was a fantastic year for solar with lots of sun. Due to the way our statements are generated, the billing year actually runs from mid-January, so this report is for the period of 1/18/2016 – 1/17/2017.

For the year, our panels generated just over 10,000 Kwh (10231), which is amazing. Our best generation period was unexpectedly mid-August to mid-September, although it only beat mid-June to mid-July by 4 Kwh. Still, you wouldn’t expect that behavior since even in September the days are already getting significantly shorter than June.

We look to be on track to make it through the winter without using up our credits again, which basically is the goal. No electric bills with a net balance to pay at all is what you want. We are running the heat pump a lot to supplement the heat in the winter, so even with that factored in we are doing okay.

I would still love to see us get our usage down a bit, but given our large house and most of us being home all day it gets tough to pare that down much. We have pretty much entirely switched over to LED lights, which has helped. Now I just have to run interference to keep them turned off when not in use. We’re also switching more stuff to electric as well, such as trying to use rechargeable batteries whenever possible. I bought an electric string trimmer made by Ego Power that I really like. It’s super powerful, a joy to work with compared with the traditional engine varieties and gives me about a half hour of good trimming. By then my arms and shoulders are usually tired anyway. A neighbor who also has solar bought an electric chainsaw that he raves about.

The electric tools have really made huge strides and will continue to benefit from all the other innovation that is improving batteries and pushing costs down. I’m hoping my lawn mower lasts long enough that my next one of those can be fully electric, but we aren’t quite there yet. There are some coming along (like Mean Green for instance), but they are still very much first wave technology and very expensive. The electric push mowers on the other hand have been around for awhile now and seem to work fairly well. I think Ego makes one that uses the same battery as my trimmer, although it may use two batteries.

We are going to continue to look for ways to move over to electric from fossil fuels where we can. For instance, I still have a propane heater in my office since the heat doesn’t make it back here. We also have a propane clothes dryer. So we still have some areas to keep in mind. I’m also keeping a close eye on battery storage, such as the Tesla PowerWall so we could eventually go completely off-grid if we wanted. I think the prices are going to drop precipitously over the next five years though, so holding out a bit.

2016 Year In Review

Bit late getting this figured out this year, but I guess it’s still January. Similar to last year, here’s a quick bullet point list of stuff we managed to accomplish this year.

  • Poultry
    • Built a “chicken tractor” big enough for about 10-15 broilers.
    • Raised and slaughtered 15 Freedom Ranger broilers. Overall it went okay, but still debating if we want to do this every year. Not including labor and equipment (2 big expenses), our cost per pound was in the low $4 range.
    • Lost two more of our original hens. We still have “Faith” the barred rock remaining from the original Bristol 4.
    • Got 6 day old Ancona ducklings and successfully raised them to adults. Three were male and three were female, so two of the boys were redundant and went to the freezer.
    • Put automatic doors on both the chicken and duck coops. This has simplified care significantly as well as made it easier for us to leave the property in someone else’s hands for a few days.
  • Gardening
    • This was the first full growing season with the greenhouse and it made a significant difference in the size and quality of my starts. We bought very few starts from outside the property this year.
    • For the most part, an amazing gardening year. Super warm and sunny, which made for an abundance of tomatoes.
    • We added more fruit trees, 6 more raspberry plants, 25 everbearing strawberry plants and another purple asparagus bed.
    • The original raspberry plants from 2015 really came into their own this year for the most part. We got a great yield of berries.
    • Had some luck for the first time with the following this year
      • Bush Limas
      • Sweet Potatoes
      • Flint corn
      • Sweet corn
    • Standouts included
      • the aforementioned tomatoes
      • Peppers did fairly well, including sweet peppers
      • Brussel sprouts finally worked. Turned out we had been planting too late for New England.
      • Dynamite popcorn
      • Bush beans of various types (green, yellow, dry)
    • Still having trouble getting melons to work with any consistency
  • Landscape and other property work
    • Cleared an overgrown patch of original landscaping from the front yard and re-contoured the whole front yard, including the drainage ditch.
    • Rebuilt the main culvert near our house, put in a small duck pond and widened the drive over the culvert.
    • Expanded the beginnings of our windbreak
    • Reshaped the driveway and added new stone/gravel.
    • Put up a Gorilla playset for the kids.
  • Goals for 2017 include
    • Attempt to convert to a mostly no-till approach in our gardens
    • Expand the existing rear garden footprint around the greenhouse
    • More fruit trees
    • Start working on the “drift” landscaping ideas in the front yard. These are wide swaths of perennial plants and grasses in mostly organic shapes following the contour of the land.
    • Expand the windbreak and begin preparing for a more extensive hedgerow or permaculture mixed species planting on the north edge of the property. We are working with a permaculture specialist on a plan for this.
    • At least begin the planning stages for fencing in the front pasture.
    • Tear down our existing rear deck and rebuild a new one.

Soon it will be time to buy and start seeds. By the way, if you are thinking about seeds, don’t forget about my site PickAPacket.com and tell your friends. It allows you to compare prices and see varieties carried by my favorite non-GMO seed companies, including lots of heirloom, organic and open-pollinated varieties.

Windbreak Update

On Friday I worked with our tree guy again and got some more trees planted in the start of our windbreak. These are a mix of Arbor Day trees he planted on his property 8 or so years ago and some Norway Spruces from a local nursery. By the way, when Arbor Day suggests planting seedlings for a few years and then transplanting them, a few years is best. Not eight years. Not a fun job digging those up and transplanting them. But hoping they survive because they are nice trees.

WindbreakJuly2016

We hope to keep extending this windbreak area and probably will add some additional diversity such as deciduous trees, small fruiting bushes such as service berry or bush cherry and so on. We are also thinking of eventually putting in a diverse hedgerow/windbreak along the entire north/north-east border of our property that might include additional fruit and nut trees, but still trying to figure that out.

Before and After: Front walk

When we first bought our place, there were just some very overgrown stepping stones leading from the side of the porch to the driveway. Not a very inviting welcome to our home.

One of the first things we did in the fall was to start a small bed next to the house and plant some bulbs. But that was really just a temporary measure and we really wanted something much more in that space. Our landscape design was able to flesh out some additional ideas and we ended up with a walkway going between two flower beds. The intention is to eventually have a full season flowering area of mostly perennials, with some annuals mixed in. This year it is mostly annuals still, but we are starting to get some perennials and also self-seeding flowers into the space.

So basically we were starting from here. The bed against the house was already there, but this is before anything is really showing up yet, like the tulips or daffodils. Here is the space cleared of grass and ready to begin.

Walkway1

Here I’ve laid out some stones just to get some ideas and started digging the trench for the walkway.

Walkway2

When we were having the excavation done, I got some help ripping up the sod at the end of the walkway next to the driveway. We used some larger stone as a base, then a bit of geotextile fabric and then some crushed rock. Here is the walkway taking shape.

Walkway3a

And mostly finished, looking from off the porch. You can see some tulips are now making an appearance. This part was finished around May 22nd.

Walkway3

Since then we have loaded up the beds with mulch and planted a bunch of stuff. So here is what it looks like today. Quite a transformation.

Walkway4