When we first starting thinking about getting some land and possibly farming, one of the things I quickly realized is the importance of knowing how to do things for yourself. A farmer needs to be a bit of a jack of all trades. Honestly, knowing how to get around on a computer is a relatively minor one of those trades. So I’ve been slowly trying to learn how to do some practical things for myself and one of those things is light carpentry and woodworking.
I didn’t get much opportunity to do that in Chicago. There just wasn’t enough room for a shop or lots of tools or much to really work on in a small condo. I was able to help a few friends with some remodeling here and there, which helped a bit. Once we got the house in Bristol and I had the possibility of actually having a small shop again, I started to think about what kinds of things I could start with.
I decided to do two projects. Instead of buying a wheelbarrow or a cart, I would build one. And I would try to build a small chicken coop for a backyard flock. I already had a good idea of what kind of cart I wanted to build, Herrick Kimball’s “Whizbang Garden Cart”. Mr. Kimball has several great blogs about agrarian life and various DIY projects. I discovered him over the course of various research I was doing into all things farm-related while in Chicago.

This cart is modeled after the “Garden Way” carts that were popular for years in New England, but it’s made out of simple materials and a fairly easy starter project for a beginner like me.

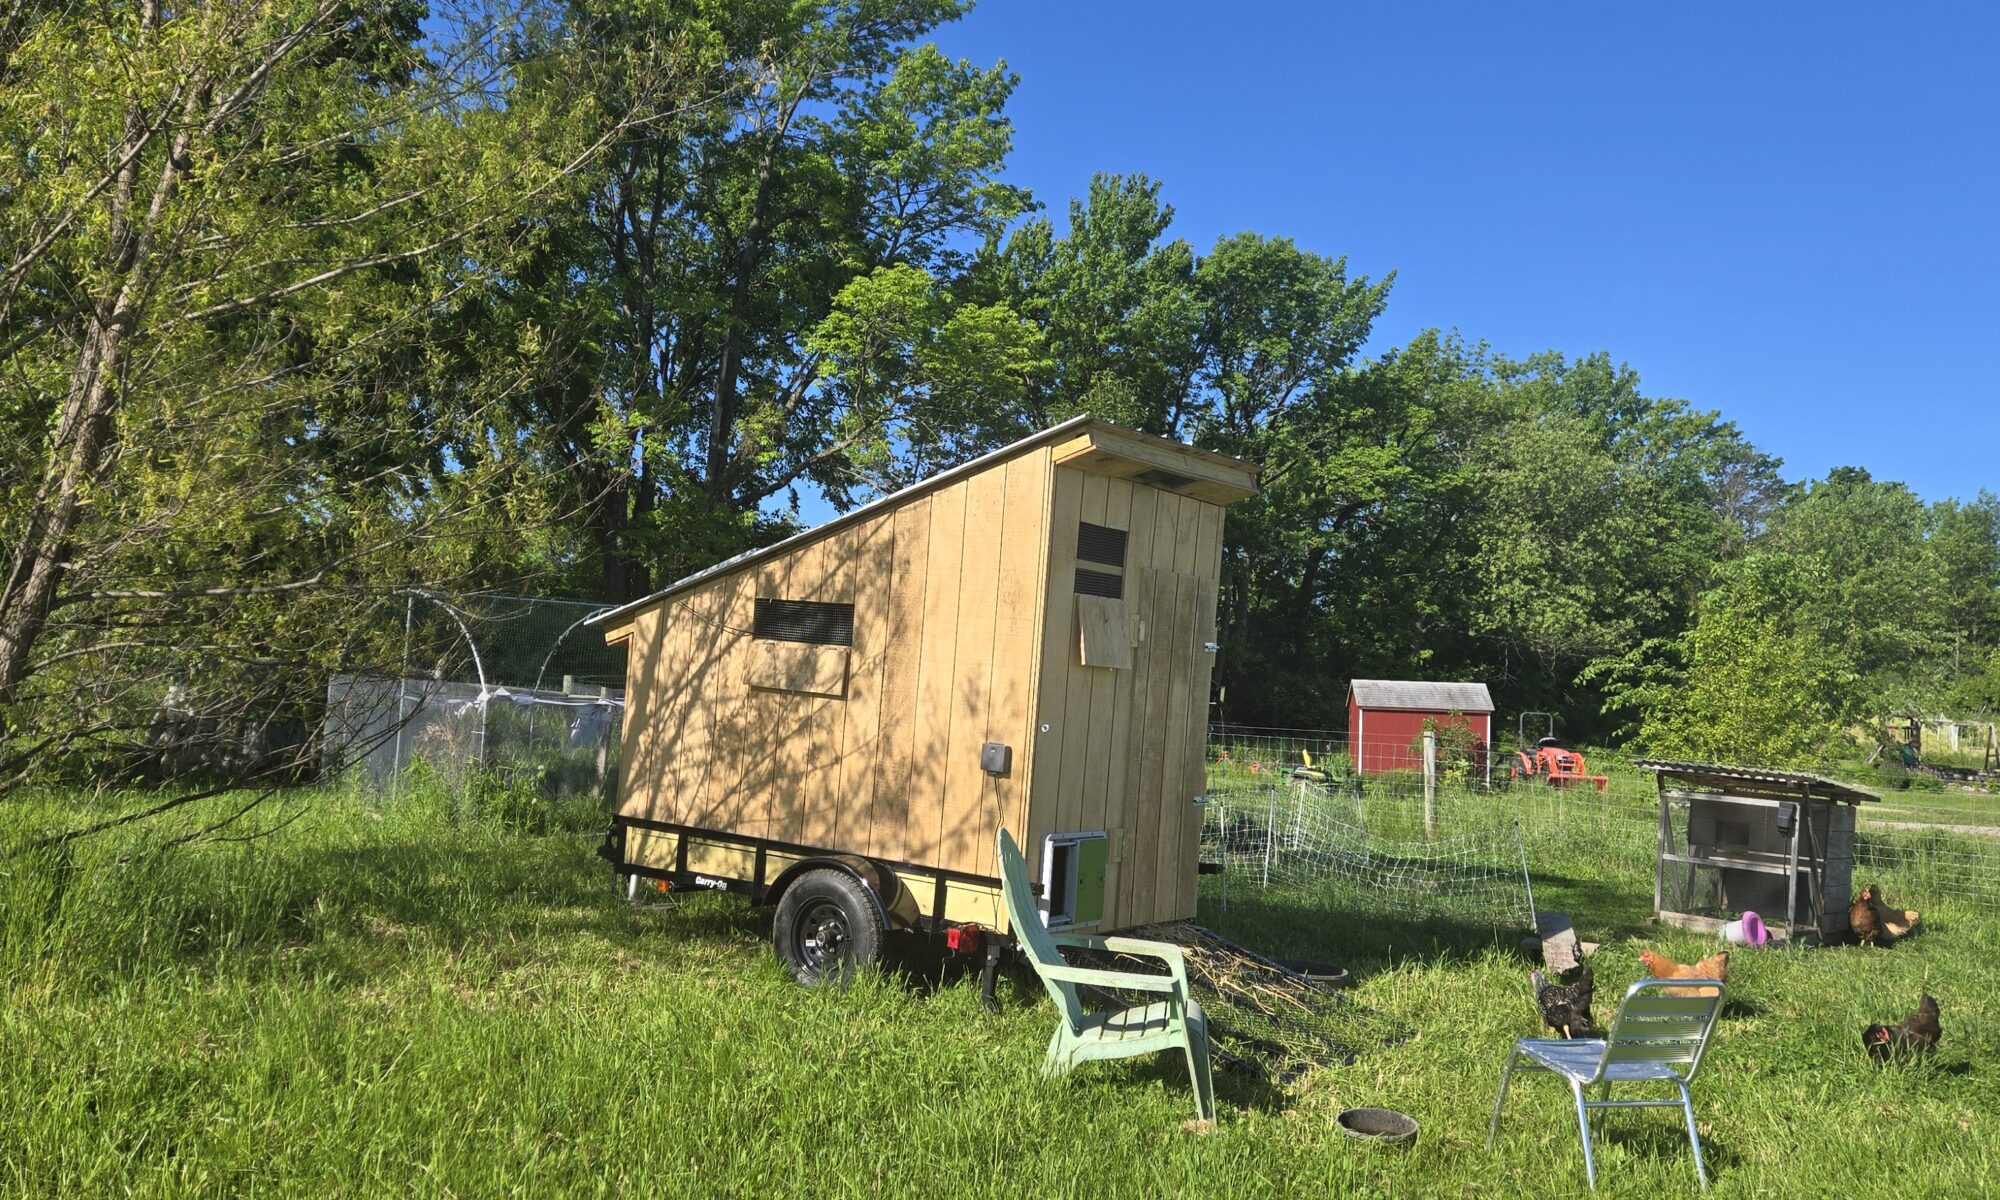
Figuring out what kind of coop I wanted to build turned out to be a bit harder than I expected. I even bought a couple of books specifically about coop designs and plans, but nothing was quite what I was looking for. Many of the plans would be great if I wanted to build something permanent or I was going to get 10-20 chickens or more. The smaller coops were too simple and would require fencing in a large run or they simply weren’t robust enough to keep chickens in through the winter. So I kept looking. I can’t remember where I finally found the plans I ended up using. I believe it was through the Backyard Chickens web site. I decided to go with the plans from theGardenCoop.com.

They have both a small coop design for 3-4 chickens and a larger design. I like both of them a lot and may end up building the bigger plan at some point as well. These plans weren’t free, but they were reasonable given the quality and attention to detail in the plans as well as the thoughtful design. They are once again very step by step and don’t assume a lot of advanced carpentry knowledge. There are even nice general carpentry tips thrown in along the way.

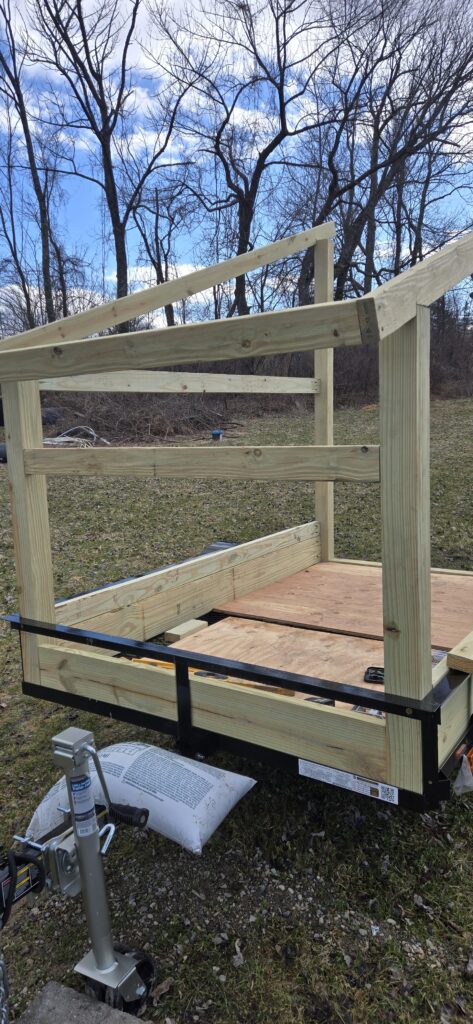
I won’t go into all the boring details of building these, but I certainly did learn a lot. It’s amazing how much you can learn just from simple projects. A few things I did for the first time or learned about include:
- using a circular saw
- doing long cuts of plywood with a circular saw
- angle cuts (I still suck at these)
- more about using a drill (pilot holes, using spade bits, drilling holes in metal, running to the hardware store “one more time” to get a bit size I didn’t have
 )
)
- very basic framing
- different ways of checking for square
- ways to put things together and connect things when working alone
- installing polycarbonate roofing panels

These projects probably took me about 10 times longer than any reasonably competent carpenter, but it was still very satisfying for me to see these projects through and be able to enjoy the end result. I’m also thankful for helpful lumber yard, hardware and metal shop folks who were willing to assist and answer beginner’s questions, as well as my carpenter friends here in Vermont who offered tips, loaned me tools and did some table saw cuts for me.
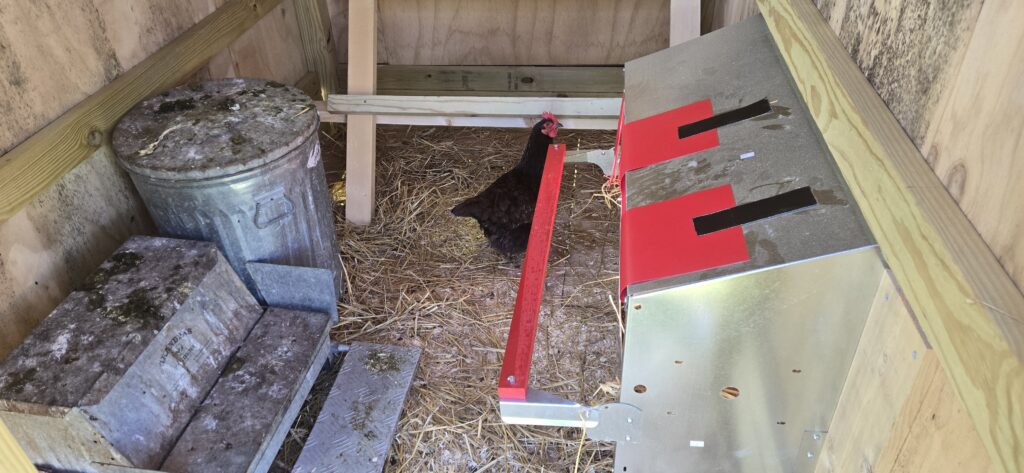
Now just need some chickens, which we are hoping to remedy tomorrow…